
Intro
I’ve found myself many times wondering how I can copy Power Apps SharePoint forms from one site/tenant to another and Microsoft does not offer something like this out of the box. After a while, I’ve found a great solution by Denis Molodtsov that helped achieve this with PowerShell scripts. It does not only import SharePoint forms, but also Power Apps (not linked to forms) and adjusts all its sources on-the-fly. How great, right?
Limitations
Although this solution works great, it has its limitations.
If you are using this script together with solutions, you won’t be able to import it. However, as long as you stick to the – let’s say – standard procedures and simply use it to import one Power Apps at a time (whether this is a SharePoint form or not), you’ll be fine.
If you’re interested why that is, feel free to read on. Otherwise, skip to the next heading.
Alright, for all the nerds out there here’s some explanation on why you won’t be able to use it in solutions:
When a solution file is being exported, the included Power Apps .zip files will be zipped “specially”. I don’t know yet what “specially” means, but somehow there is a flag, a setting, or anything in between that makes this solution .zip file special. The script by Denis Molodtsov is simply opening all the files there are in a Power Apps zip, modifying them, and putting them together again into a zip file. Since there is no way (yet) to know what special .zip setting has been set by default solution .zip files, the script will just create an ordinary one. Once the solution is being imported, the import wizard realizes that and throws an error.
Enough nerd stuff for now, let’s read on…
Copy Power Apps SharePoint Form – How it works
There are four steps to copy a SharePoint Power Apps Form from one site collection/tenant to another:
- Export the SharePoint Power Apps form
- Modify the exported Power Apps form
- Import the modified Power Apps form
- Publish it
Luckily, this is easier than it sounds ;-). The solution includes a bunch of scripts. Don’t worry though, you just need to execute one of them. The rest is automated.
The scripts have been created by Denis Molodtsov. I don’t take credit for it whatsoever. If you’d like to thank him, I’m sure he’d be happy about it.
The tool needs to have your Power Apps .zip file in a predefined folder (more to that below). It will then unzip it, go through your Power Apps files within that zip, modify all its sources (in case there are sources to modify), will zip it back together, and place it in another folder. This newly created .zip file can then be used to be imported.
This process works for lists as well as for libraries. For this example, I’m just going to use a list.
- Go to the SharePoint list the Power Apps form is associated with. On the top right corner, click on the gear icon and select List settings.
- Click on Form settings
You should see the second option to be selected

- Click on See versions and usage and you’ll be redirected to the Power Apps portal where you can see further details about this form, such as Details, Versions, Connections, etc.
- From here on out, you can use the native export feature from Power Apps. Click on Export package at the top
- Give your package a name and click on Export
- Save it to a location of your choice on your computer. We’re going to need this package for the next step
Step 2 – Modify the exported Power Apps form
For this step to work, the scripts are using the SharePointPnPPowerShellOnline module. If you don’t have it on your device yet, quickly open PowerShell as Admin and install it with the following line:
Install-Module SharePointPnPPowerShellOnline
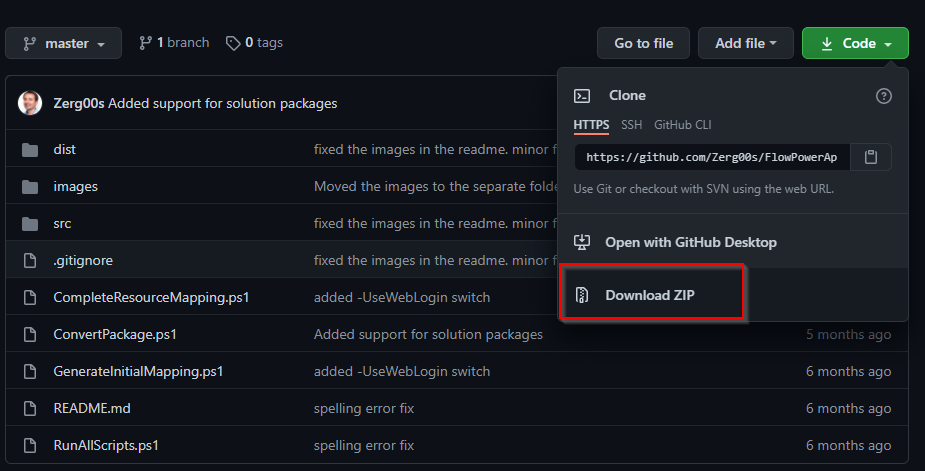
- The first thing to do is to download all the files from the GitHub – FlowPowerAppsMigrator repository. Click on the GitHub link, then on the Code button, and finally on Download ZIP.
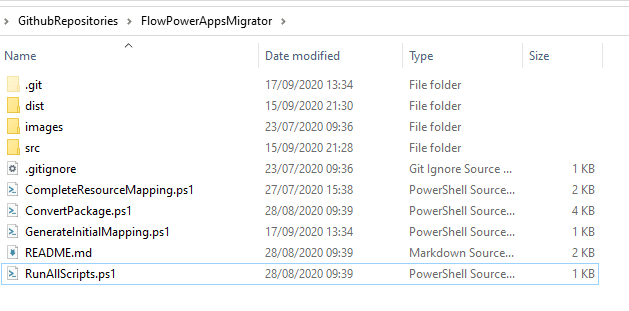
- Once this is done, export its files to a folder of your choice. You should see something like below now. In my case, I’ve created a folder in C:\GithubRepositories\FlowPowerAppsMigrator.
- Copy your Power Apps .zip you downloaded in the previous step to …\FlowPowerAppsMigrator\src
- Once done, under …\FlowPowerAppsMigrator you’ll find a script called RunAllScripts.ps1. Open it in PowerShell (I would open it in ISE or any PowerShell Editor of your choice. Don’t execute it directly… not that it wouldn’t work, but just so you can actually see what is going on. I’m opening it in Visual Studio Code).
This script just executes 3 other scripts and converts your source URL’s and GUIDs from the .zip package with the destination URL’s and GUIDs - In PowerShell, navigate to the right folder. In my case I’m doing this with:
cd "C:\GithubRepositories\FlowPowerAppsMigrator"
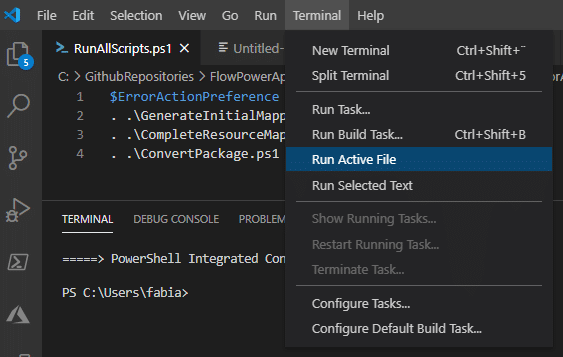
- When you’re ready, execute the script. In Visual Studio Code, I’m doing that by clicking on Terminal –> Run Active File
- It will then ask you for the source URL. This is the site in which your list / Power Apps SharePoint form is that you would like to export. E.g. https://<your tenant>.sharepoint.com/sites/ExportPowerAppsForm
- You’ll then be prompted to login to the source. Do that.
- After that, you’ll be asked for the destination URL. E.g. https://<your tenant>.sharepoint.com/sites/ImportPowerAppsForm
Note: This could be another tenant or simply another site. That’s the great thing about it… it doesn’t matter! - Again, you might be prompted to login (unless it’s the same tenant.. I think it should automatically go through then)
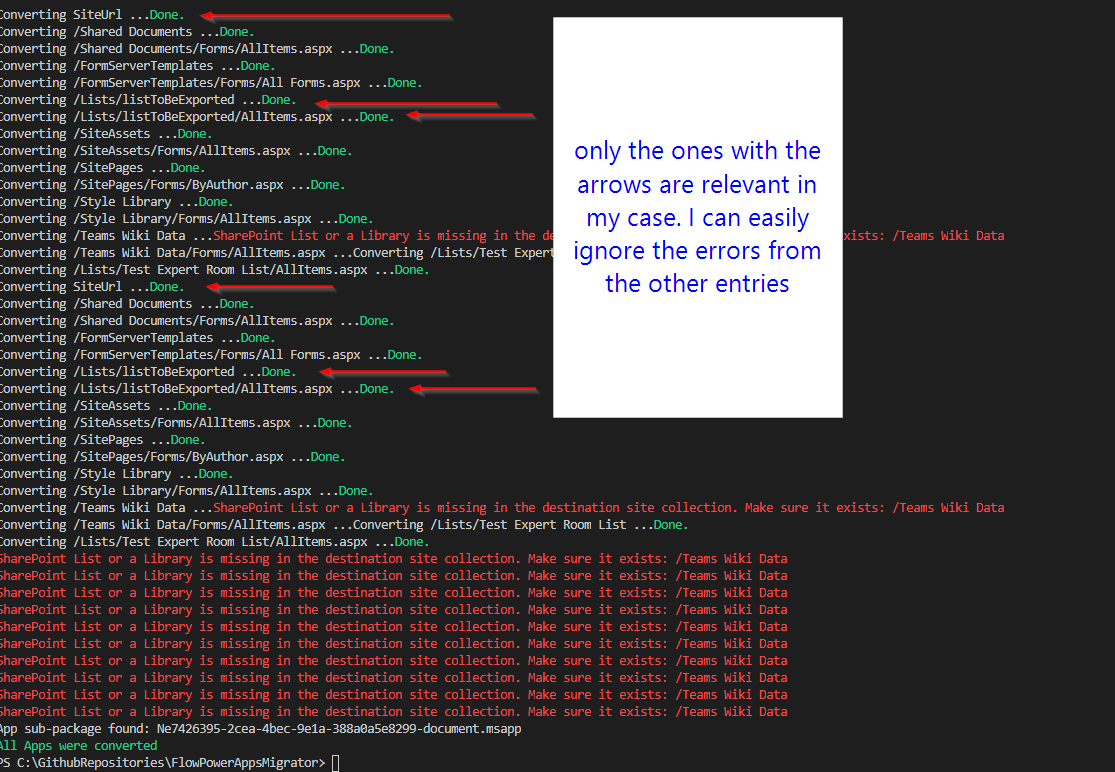
- You can see that the script is going through all lists & libraries there are in the source site and replaces them with the ones from the destination. You might see some errors – as long the lists/libraries throwing an error are included in your PowerApps, you can ignore them. Otherwise, dive into that and check what might be the cause. Generally, though, this step hardly fails
- Once it is done, the tool has created a new .zip file in the dist folder. In my case under C:\GithubRepositories\FlowPowerAppsMigrator\dist. This is the file we need to import in Step3
Step 3 – Import the modified Power Apps form
Almost done. In this step, we’re going to import the converted Power Apps SharePoint Form file and upload it.
- At first, you would need to make sure that the list you’re trying to import the Power Apps Form to does not have any Power Apps Forms connected to it yet
- To check, go to your list that you’d like to import your Power Apps Form to
- Click on the gear icon at the top right, then on List Settings
- Click then on Form settings
- Make sure the first radio button is selected –> Use the default SharePoint form
- In case there is a Power Apps Form already associated with the list, a new option under Use a custom form created in PowerApps (requires new list experience) will appear, that says Delete custom form. Click on that and confirm
- Go to your Power Apps Portal and click on Apps
- At the top, click on Import canvas app
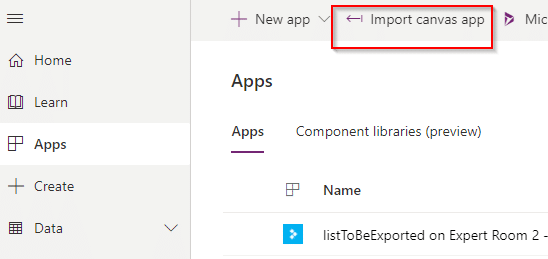
- Click on Upload and select the converted .zip file from the dist folder
- Wait for it to be uploaded
- Under the Action column, there is a wrench icon. Click on that
- In the dropdown under Setup, it says Update. Click on it and select Create as new
- Give your form a new name (mandatory!) and click on Save
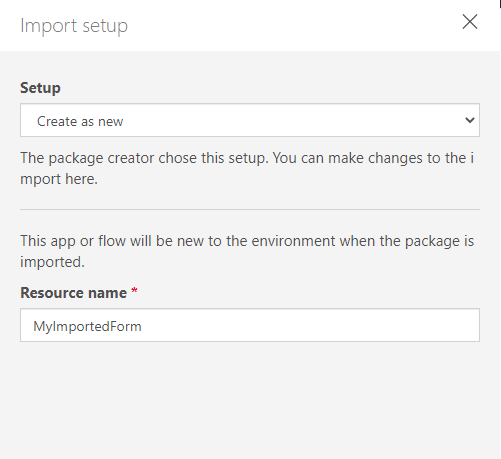
- Click on Import
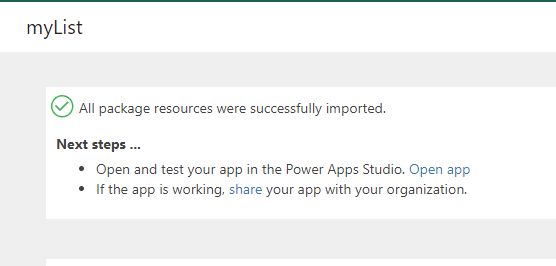
- If you did everything correctly, this should now have been successfully migrated and there is only one last step to be done – Publish it
Step 4 – Publish it
Reading through all the steps above it looks like this is a Mammut project, but it actually isn’t THAT bad, right? Or maybe I’m just fooling myself. Anyway, up to the last bit.
- Once it has been successfully imported, at the top of the page right under Next steps, click on Open app
- Check if all the data sources are pointing to the right location. I would also recommend to quickly click on Refresh on all of them.
Should there be a data source error, you probably didn’t fix the errors thrown in step 2 -11 - Save the app and then click on Publish to SharePoint and confirm. In case there is no Save button available, do a small modification to the app so the Save button will become available
Et voilà! Done. You will now have the Power Apps SharePoint form from your source list copied to your destination list.
Conclusion
Thanks to Denis Molodtsov’s tool we can copy Power Apps SharePoint Forms from one list to another – even between tenants. While this whole process looks rather complicated at first, it isn’t really that hard. And with a little modification, you can easily automate the export-import process from your sites.
Also, there is already an idea submitted for Microsoft to deliver such an option out of the box, but it’s over 2 years old and its status switched from new, to in-progress and back to under review. I even think I saw this feature once on the roadmap, but let’s see.


